STEP ONE: Building A Breadboard Arduino
Overview
In this lesson you are going to construct a Metromini/Arduino Uno on your breadboard. The advantage of building a the Arduino on a breadboard is that:
It costs less. The Metro Mini costs $12.50. The parts to build this device cost under $3.00. This is important if you are building a permanent project and don’t need features such as on-board USB, a voltage regulator and reset button.
It is more configurable: Using breadboard version of the device, you can easily change the power supply from 1.8V to 5.0V. You can also easily change the clock speed from a slow 32.768 real time clock pulse to a fast 20Mhz.
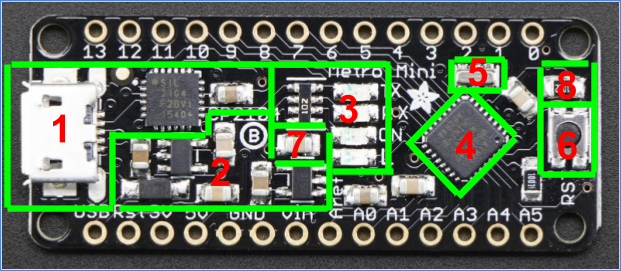
Above is a diagram of the Metro Mini broken down into functional groups of components. Below is a description of each of these groups. For these devices the name used on your breadboard schematic is included.
USB Converter. This section of the board is responsible for converting the USB signal from the computer to a pair of serial signals that can be used by the microcontroller.
Power Conversion: This section of the board is responsible for providing direct power from the USB as well as regulated power for 5V and 3.3V.
LEDs: This section includes LEDs and their resistors which are used to indicate power on the board and whether data is being sent to or from the device.
Microcontroller: This is a surface mount version of the ATMega328p, which is the microcontroller that you program. (IC1)
Clock: This is the crystal clock resonator that used to provide the correct timing “heartbeat” for your controller. (Y1)
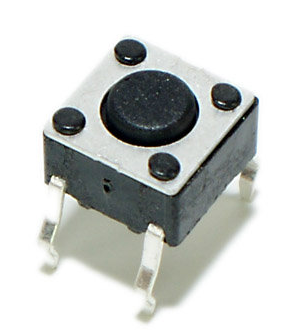
Reset: The reset button is used to reset the code on the controller back to the beginning. It is useful if the code gets stuck in a bad state. (S1)
Filter: This is a capacitor that is being used to filter or clean the power supply against voltage spikes. (C2)
Pullup: This is a resistor that is used to prevent the microcontroller from going into the reset state. (R2)
Collecting components
You will now build a working version of the Metromini or Arduino Uno using individual components and on a breadboard. Below are the components you need to collect. You will only need one of each.
Item |
Image |
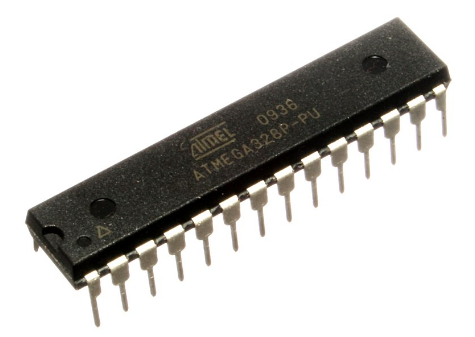
ATMega328p microcontroller |
|
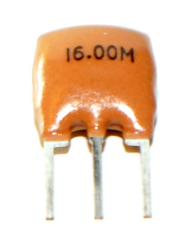
16Mhz Resonator |
|
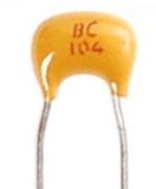
.1uF Capacitor |
|
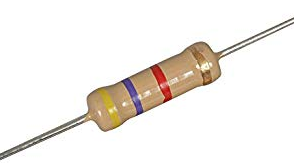
4.7K Resistor |
|
Momentary switch |
|
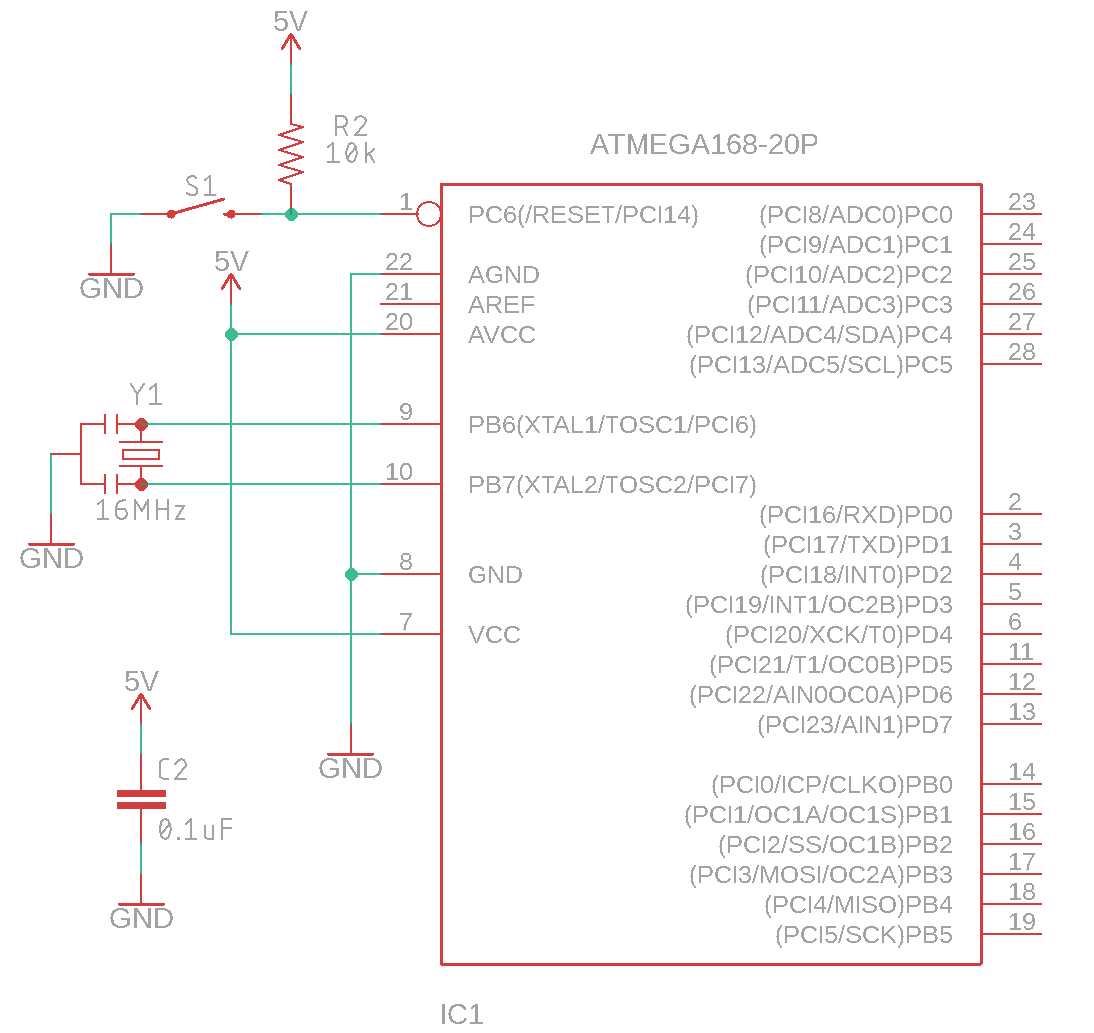
Breadboard Schematic
The following is the basic microcontroller circuit. Carefully construct this circuit on your breadboard. Make sure to use short wires for your all your connections. Neatness counts! Important: The numbers on the IC1 correspond to order of the pins on the actual IC. All ICs start their pin counts at 1 under a notch or divit. The counting always continues in a counterclockwise direction around the IC. An example is below (Note: the example IC in the picture is not an ATMega328).

Name |
Description |
IC1 |
The ATMega328p At |
Y1 |
The crystal clock resonator |
C2 |
The filter capacitor |
R2 |
The pullup resistor |
TEACHER CHECK ____